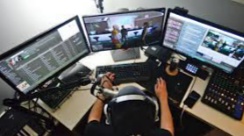
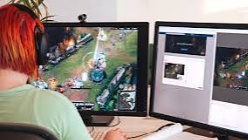
If you're looking to share your gaming experiences with a wider audience, streaming on Facebook with your PC is a great way to do so. To get started, you'll need to download and install streaming software such as OBS or Streamlabs OBS on your PC. Next, log into your Facebook account and navigate to the Live Producer section. From there, click on "Create Live Stream" and copy the server URL and stream key provided. Paste this information into your streaming software and configure your stream settings (resolution, framerate, etc.). Finally, hit the "Start Streaming" button in your streaming software to go live on Facebook with your gameplay. Don't forget to engage with your viewers and have fun while streaming!
Broadcasting Your Battles: A Comprehensive Guide to Streaming Games on Facebook with PC
Welcome, fellow gamers! Do you crave the thrill of sharing your gaming prowess with the world? Perhaps you dream of building a vibrant community around your passion for specific titles? Well, Facebook Gaming presents a fantastic platform to showcase your skills and connect with like-minded individuals. This guide delves deep into the world of Facebook game streaming on PC, equipping you with the knowledge and steps necessary to embark on your broadcasting journey.
Part 1: Gearing Up for Glory (Preparation Phase)
Before we dive headfirst into the world of streaming, let's ensure you have the necessary equipment and software to deliver a smooth and engaging experience for your viewers.
1.1 Building Your Streaming Arsenal
PC: The cornerstone of your streaming setup is your PC. While the specific requirements vary depending on the game you intend to play, a mid-range gaming PC with a dedicated graphics card (GPU) is ideal. Consider your chosen game's recommended specifications and aim for a PC that exceeds them slightly to ensure smooth gameplay and streaming performance.
Processor (CPU): A powerful CPU is crucial for encoding your gameplay footage and handling background tasks while streaming. Aim for a processor with at least 4 cores and 8 threads for a seamless experience. Popular options include AMD Ryzen or Intel Core i5 processors.
Graphics Card (GPU): The GPU handles rendering the game visuals and plays a significant role in ensuring smooth gameplay while streaming. Modern games often require dedicated GPUs for optimal performance. Popular choices include NVIDIA GeForce GTX or RTX series and AMD Radeon RX series cards.
RAM: RAM (Random Access Memory) acts as your PC's temporary workspace. Having sufficient RAM allows your system to handle multitasking, including running demanding games and streaming software simultaneously. Aim for at least 16GB of RAM for a smooth experience.
Storage: Games can take up a considerable amount of storage space. Ensure you have enough storage available to house the games you wish to stream alongside your operating system and streaming software. Consider using a Solid State Drive (SSD) for faster loading times.
Internet Connection: A stable and fast internet connection is paramount for streaming. Aim for an upload speed of at least 5 Mbps (megabits per second) for basic streaming and consider higher speeds (10 Mbps or more) for higher quality broadcasts.
Microphone: A clear microphone is essential for interacting with your viewers. A dedicated USB microphone with good noise cancellation capabilities will deliver superior audio quality compared to your PC's built-in microphone.
Headset/Speakers: While not mandatory, a comfortable headset or a good speaker setup allows you to hear in-game audio and communicate with viewers clearly.
Webcam (Optional): A webcam adds a personal touch to your stream, allowing viewers to see your reactions and expressions. However, it's not essential for every streamer.
1.2 Software Savvy: Tools of the Trade
Now that you have the hardware, let's explore the software you'll need to get your stream up and running.
Streaming Software: This is arguably the most crucial software in your arsenal. It captures your gameplay footage, microphone audio, webcam feed (if applicable), and overlays (graphics and text elements) before sending it out to Facebook. Popular options include Open Broadcaster Software (OBS Studio) (free and open-source), Streamlabs OBS (free, built on top of OBS with additional features), and XSplit (paid, with advanced features).
Facebook Gaming Creator Studio or Meta Suite creator: While not strictly necessary for streaming, Facebook Gaming Creator Studio offers valuable features for managing your streams, analyzing performance, and interacting with viewers. You can access it through https://www.facebook.com/creatorstudio.
Part 2: Setting the Stage: Configuring Your Stream
Once you have your equipment and software in place, it's time to configure your stream. Here's a breakdown of the steps involved:
2.1 Configuring Your Streaming Software (Using OBS Studio as an example):
Installation: Download and install your chosen streaming software.
Scenes and Sources: In OBS Studio, a "Scene" is a collection of sources (game capture, webcam, audio, etc.) that appear on your stream. Create a scene for your gameplay and, optionally, one for an intro or outro screen.
Adding Game Capture: Right-click in the Sources section of your scene and choose "Game Capture." Select the appropriate option to capture your desired game. You may need to experiment with different capture methods based on your specific game.
Audio Sources: Add "Mic/Aux" as a source to capture your microphone audio. You can adjust audio levels in the Mixer section.
Webcam (Optional): Add a "Video Capture Device" source to capture your webcam feed. Adjust the position and size of the webcam window in the preview window.
2.2 Setting Up Your Stream on Facebook:
Facebook Gaming Page: To stream on Facebook, you'll need a Facebook Gaming Page. If you don't have one, create a new page specifically for your gaming content.
Live Streaming Permissions: Navigate to your Facebook Gaming Page settings and ensure "Live Video" is enabled. You may also need to review and adjust your streaming permissions under "Gaming Options."
Creator Studio: Access Facebook Gaming Creator Studio (https://www.facebook.com/creatorstudio) and navigate to the "Live" section.
"Go Live" Button: Click the "Go Live" button and select "Go Live Now" to initiate the live stream setup process.
Stream Key: Locate the "Stream Key" section in the Creator Studio. This unique key acts as the link between your streaming software and Facebook.
2.3 Connecting OBS Studio to Facebook:
Settings: In OBS Studio, navigate to "Settings" and then "Stream."
Facebook Live: Choose "Facebook Live" from the service dropdown menu.
Stream Key: Paste the copied Stream Key from Facebook Creator Studio into the "Stream Key" field in OBS Studio.
Connection Test: Perform a connection test to ensure OBS Studio can connect to Facebook.
2.4 Optimizing Your Stream Quality:
Output: In OBS Studio settings, navigate to the "Output" tab.
Encoder: Choose a suitable encoder (e.g., x264 for CPU encoding or NVENC for GPU encoding based on your hardware).
Bitrate: Set an appropriate bitrate for your upload speed. Aim for 3,000-5,000 kbps for basic streaming and consider higher values (6,000 kbps or more) for higher quality broadcasts with good upload speeds. Experiment to find the optimal balance between quality and smoothness based on your internet connection.
Resolution and FPS: Choose a resolution and frame rate (FPS) suitable for your internet connection and PC capabilities. Aim for 720p at 30 FPS for a stable stream on most setups. You can try higher resolutions and frame rates if your hardware and internet can handle them.
2.5 Personalizing Your Stream:
Overlays: Customize your stream's appearance by adding overlays. You can create your own overlays using image editing software or download free/paid options online. Overlays can include elements like your logo, follower count, recent donations, and more.
Alerts: Set up alerts in OBS Studio to notify viewers when someone subscribes, donates, or follows your channel. This adds a layer of interactivity and keeps your viewers engaged.
Chat Box: Integrate your Facebook stream chat into your OBS Studio layout. This allows you to interact with viewers directly on your stream.
Part 3: Showtime! Going Live and Beyond
Now that you've configured your stream, it's time to take center stage! Here's what you need to know about going live and maintaining a successful stream:
3.1 Launching Your Stream:
Preview Mode: Use the preview mode in your streaming software to ensure everything looks and sounds as intended before going live.
Go Live: Once satisfied with the preview, return to Facebook Creator Studio and initiate the live stream by clicking "Go Live" at the bottom of the window.
3.2 Broadcast Like a Pro: Tips for Engaging Gameplay and Interaction
Content and Schedule: Choose games you're passionate about and create a consistent streaming schedule to build a loyal viewership.
Be Entertaining: Inject personality into your stream. Talk to your viewers, share your thoughts on the game, and react to events.
Interact with Your Chat: Respond to viewers' comments and questions. Show genuine appreciation for their support.
Maintain Stream Quality: Monitor your stream's quality and adjust settings if necessary to ensure smooth playback.
Engagement Tools: Utilize Facebook's built-in engagement tools like polls and questions to keep viewers actively involved.
Wrapping Up Your Stream:
Outro Screen: Consider having a dedicated outro screen thanking viewers for watching, promoting your social media channels, and announcing your next stream schedule.
End Stream: In Facebook Creator Studio, click "End Stream" to conclude your broadcast.
3.4 Post-Stream Activities: Analyzing Performance and Growing Your Audience
Review Stream Performance: Facebook Creator Studio provides analytics to help you understand your stream's performance. Analyze metrics like viewers, watch time, and engagement to identify areas for improvement.
Highlight Creation: Consider creating highlight reels of your best moments or funny clips to share on other platforms like YouTube or TikTok.
Community Building: Engage with your viewers beyond your streams. Post on your Facebook Gaming Page regularly, interact with comments and messages, and participate in relevant gaming communities.
Collaboration: Consider collaborating with other streamers in your niche. This can help you reach new audiences and build stronger connections within the gaming community.
Continuous Improvement: Streaming is a journey of learning and refinement. Experiment with different content formats, production techniques, and audience interaction methods to find what works best for you and your viewers.
4.1 Monetization Options:
Facebook In-Stream Ads: If you meet Facebook's eligibility criteria, you can enable in-stream ads during your broadcasts to generate revenue.
Facebook Stars: Viewers can purchase Stars, a virtual currency, to support your stream directly.
Subscriptions: Offer paid monthly subscriptions with exclusive benefits for loyal viewers.
Donations: Enable donations through services like Streamlabs to allow viewers to contribute directly.
4.2 Advanced Technical Considerations:
Multistreaming: If you have the bandwidth, consider using multistreaming tools to broadcast your stream simultaneously to multiple platforms like Facebook and Twitch.
Hardware Upgrades: As your stream grows, consider upgrading your hardware for smoother performance and enhanced visuals.
4.3 Stream Etiquette and Community Guidelines:
Community Guidelines: Familiarize yourself with Facebook's Community Guidelines to ensure your content aligns with their policies.
Respectful Environment: Foster a welcoming and respectful environment for your viewers. Moderate your chat to maintain a positive atmosphere.
Read Also: Level Up: How Facebook Gaming Is Changing the Game.
Copyright: Be mindful of copyright restrictions when playing music or using copyrighted content in your streams.
Conclusion:
By following the steps outlined in this guide and continually refining your approach, you can establish a successful Facebook game streaming channel. Remember, the most important ingredient is your passion for gaming and your desire to connect with fellow players. So, grab your controller, fire up your streaming software, and get ready to share your gaming world with the world!
Please if you love this content, please follow our blog and share this content.


