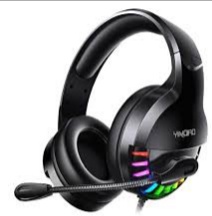
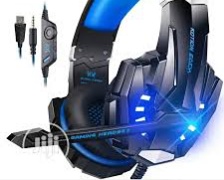
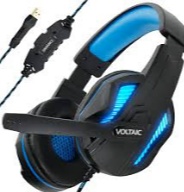
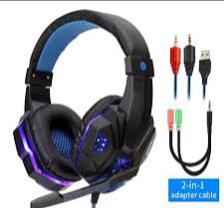
Connecting a gaming headset to a PC is a relatively simple process that can enhance your gaming experience. To start, locate the headphone and microphone jacks on your PC - these are usually found on the front or back of the computer tower. Next, plug the headset's audio cable (usually green) into the headphone jack and the microphone cable (usually pink) into the microphone jack.
If your headset has a USB connector, simply insert it into a USB port on your PC. Once the hardware is connected, navigate to your computer's sound settings and select the gaming headset as the default audio input and output device. This will ensure that you can hear game audio and communicate with teammates through the microphone. With these steps, you'll be ready to immerse yourself in your favorite games with clear audio and crisp communication.
Enhance Your Gaming Experience: Connect Your Headset to Your PC
Connecting a gaming headset to your PC is a straightforward process that requires just a few simple steps. To begin, locate the headset's connector cable, which typically ends in a 3.5mm audio jack or USB plug. If your PC has a dedicated headphone jack, simply plug in the 3.5mm audio jack. If your headset uses a USB connector, insert it into an available USB port on your PC. Next, ensure that your headset is set as the default audio output device on your computer by accessing the Sound settings in the Control Panel or System Preferences. Once your headset is recognized by your PC, you should be able to enjoy immersive audio and clear communication while gaming. By following these steps, you can easily connect your gaming headset to your PC and enhance your gaming experience.
Gearing Up for Glory: A Comprehensive Guide to Connecting Your Gaming Headset to Your PC
The battlefield beckons, your teammates await, and victory hinges on clear communication. But before you dive headfirst into the fray, ensuring your gaming headset is properly connected to your PC is paramount. This guide serves as your trusty companion, navigating you through the various connection methods and potential pitfalls so you can dominate the competition with crystal-clear audio and seamless voice chat.
Know Your Weapon: Wired vs. Wireless Headsets
Gaming headsets come in two primary flavors: wired and wireless. Each boasts its own set of advantages, so understanding the differences is crucial.
Wired Headsets:
Pros: Generally more affordable, provide a reliable and consistent connection with minimal latency (delay), often come with superior audio quality.
Cons: Tethered by a cable, limiting mobility, can be prone to tangles and cable damage.
Wireless Headsets:
Pros: Offer greater freedom of movement, ideal for those who prefer a clutter-free setup.
Cons: Can be more expensive, battery life becomes a concern, wireless connections are susceptible to interference which can cause audio dropouts or lag.
Unsheathing Your Weapon: The Connection Armory
Now that you've identified your weapon of choice, let's explore the methods for connecting it to your PC.
1. Wired Headset Warriors: A Straightforward Approach
Wired headsets typically utilize a 3.5mm jack, the familiar audio plug found on most headphones and portable speakers. Your PC will likely have two dedicated ports for this connection:
Headphone Jack (Green Port): Responsible for delivering audio output to your headset.
Microphone Jack (Pink Port): Enables voice input through your headset's microphone.
The Single-Jack Savior:
Many modern headsets, wired and wireless alike, sport a single 3.5mm jack with integrated audio and microphone functionality. However, some PCs only have a single audio port. Fear not, for a simple solution exists:
The Headset Splitter: This nifty little adapter features two 3.5mm jacks, one for headphones and another for microphone. Plug your headset's single jack into the splitter, then connect the splitter's individual jacks to the respective headphone and microphone ports on your PC.
2. Wireless Warriors: Unleash the Cables
Wireless headsets boast the convenience of a cable-free connection but require an additional step: pairing with your PC. This process usually involves:
Powering Up: Ensure your headset is turned on and charged if necessary.
Pairing Mode: Consult your headset's manual to activate pairing mode. This often involves holding a specific button for a few seconds, indicated by a blinking light.
PC Bluetooth Bonanza: Open your PC's Bluetooth settings. Look for "Add device" or a similar option. Your headset should appear on the list. Select it and follow any on-screen prompts to complete the pairing process.
3. The Universal Soldier: USB Headsets
Some high-end headsets opt for a USB connection, offering a dedicated link for both audio and microphone functions. Simply plug the USB cable from your headset into an available USB port on your PC. Windows should automatically recognize the device and install any necessary drivers.
Conquering the Audio Realm: Software Setup
Once the physical connection is established, it's time to configure your PC's sound settings to ensure your headset functions optimally.
Windows Audio Wizard: Right-click on the speaker icon in your taskbar's system tray. Select "Sounds" and navigate to the "Playback" tab. Locate your headset from the list of devices, right-click it, and choose "Set as Default Device" for both playback and recording (microphone).
Advanced Settings: The "Sounds" menu also offers advanced settings where you can adjust audio levels, microphone boost, and potentially access additional features specific to your headset's software.
Testing Your Mettle: Ensuring Functionality
Before venturing into the competitive arena, test your headset to verify both audio output and microphone input are working correctly. Many games and communication platforms like Discord offer built-in testing tools. Utilize these to ensure your voice is clear and incoming audio sounds crisp.
Troubleshooting Turmoil: Vanquishing Audio Woes
Should you encounter audio issues, fret not! Here are some common troubleshooting steps:
Read Also: PC gaming desk : Unleash Your Gaming Potential with the Perfect Desk.
Double-Check Connections: Ensure all jacks are firmly plugged in and the headset is properly paired (for wireless).
Default Device Dilemma: Verify your headset is set as the default playback and recording device in your PC's sound settings.
Driver Debacle: Outdated or missing drivers can cause problems. Visit your headset manufacturer's website to download and install the latest drivers for


0 Comments