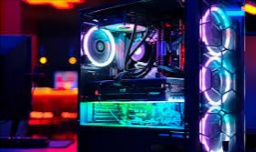
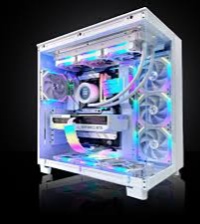
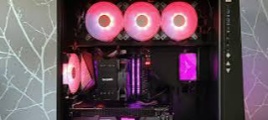
Building your own gaming PC can be a rewarding and cost-effective way to experience high-performance gaming. When it comes to putting together a gaming PC build, there are a few key components to consider. The processor, also known as the CPU, is the brain of the computer and plays a crucial role in determining the overall performance. For gaming, a higher-end CPU like an Intel Core i7 or AMD Ryzen 7 is recommended. Additionally, a dedicated graphics card is essential for handling the intense graphics of modern games.
Popular choices include the NVIDIA GeForce RTX series or AMD Radeon RX series. RAM, storage, and a reliable power supply are also important factors to consider when building a gaming PC. By carefully choosing each component based on your budget and gaming needs, you can create a powerful and customized gaming rig that will provide hours of immersive gameplay.
Building Your Dream Gaming PC: A Comprehensive Guide
The thrill of crafting a custom gaming PC is unmatched. You get to choose every component, ensuring it perfectly aligns with your budget and performance goals. This guide empowers you to navigate the exciting yet intricate world of PC building, providing step-by-step instructions and insightful recommendations.
Before You Begin: Planning and Budgeting
Identify Your Needs: What kind of games do you plan to play? Do you prioritize high frame rates (FPS) for competitive titles or high resolutions for immersive experiences? This will significantly impact your CPU and graphics card (GPU) choices.
Set a Budget: Be realistic about how much you're comfortable spending. Allocate funds for essential components like CPU, GPU, RAM, storage, motherboard, case, power supply (PSU), and cooling. Consider peripherals like monitor, keyboard, mouse, and headset separately.
Research and Compare: Utilize online resources like PCPartPicker [ PCPartPicker] to compare component prices and compatibility. Popular tech channels on YouTube also offer valuable build guides and reviews.
Choosing Your Components: The Core of Your PC
Central Processing Unit (CPU): The brain of your PC, handling in-game calculations and multitasking. Popular choices include AMD Ryzen and Intel Core processors. Consider core count, clock speed, and threading capabilities based on your needs.
Graphics Processing Unit (GPU): Renders visuals in games. NVIDIA GeForce and AMD Radeon are the primary contenders. Prioritize higher-end GPUs for demanding titles at high resolutions and frame rates.
Random Access Memory (RAM): Provides temporary storage for frequently accessed data. 16GB is the current standard for smooth gaming, with 32GB recommended for futureproofing. Ensure compatibility with your motherboard's RAM type (DDR4 is common).
Storage: A combination of a Solid State Drive (SSD) and a Hard Disk Drive (HDD) is ideal. SSDs offer lightning-fast boot times and game loading, while HDDs provide ample storage at a lower cost.
Building the PC: Step-by-Step Guide
Prepare Your Workspace: Find a clean, well-lit area with ample space.
Install the CPU: Carefully unlock the motherboard socket and gently place the CPU in the designated slot, ensuring proper alignment. Secure the socket lever.
Apply Thermal Paste: Apply a pea-sized amount of thermal paste to the CPU's integrated heat spreader (IHS) for efficient heat transfer to the CPU cooler.
Mount the CPU Cooler: Depending on the cooler type, follow the manufacturer's instructions for secure attachment to the motherboard.
Install RAM: Locate the RAM slots on the motherboard and gently insert the RAM sticks, following the channel configuration (often dual-channel for two sticks).
Prepare the Case: Remove the side panel and any unnecessary drive bays for better airflow.
Install the Motherboard: Secure the motherboard to the case using the provided screws and standoffs. Ensure proper alignment with I/O shield at the back panel.
Connect Storage Drives: Mount the SSD and/or HDD in designated drive bays and connect them using SATA data and power cables from the PSU.
Install the Graphics Card: Locate the PCIe x16 slot on the motherboard and carefully insert the GPU, ensuring secure attachment.
Connect the Power Supply: Install the PSU in the designated location within the case. Connect all necessary power cables to the motherboard, CPU, GPU, storage drives, and any case fans.
Cable Management: Route cables neatly behind the motherboard tray to improve airflow and aesthetics. Utilize zip ties or built-in cable management features of the case.
Connect Peripherals: Connect your monitor, keyboard, mouse, and headset to the appropriate ports on the back of the case.
Finishing Touches and Software Installation
Close the Case: Secure the side panel and ensure all connections are secure.
Power Up!: Connect your PC to the power outlet and flick the switch. If everything is assembled correctly, the system should boot up.
Operating System Installation: Install your preferred operating system (Windows 10 or 11 are popular choices) onto your SSD. Most manufacturers provide installation media or download options.
Driver Installation: Download and install the latest drivers for your motherboard, graphics card, and other components from their respective manufacturer websites.
Optimizing Your Gaming PC: Performance Tweaks and Beyond
Congratulations on building your very own gaming PC! Now that it's up and running, here's how to fine-tune it for an even better experience:
Software Optimization:
BIOS Settings: Most motherboards offer a Basic Input/Output System (BIOS) that allows you to configure various hardware settings. Explore options like XMP profiles for overclocking your RAM to its rated speed (if applicable) or enabling features like multi-core processing. Refer to your motherboard manual for specific instructions. Caution: Overclocking can improve performance but can also increase heat and instability if not done correctly.
Graphics Settings: Most modern graphics cards come with companion software from their respective manufacturers (NVIDIA GeForce Experience or AMD Radeon Software). These applications allow you to optimize game settings for performance or visual quality based on your preferences.
Background Processes: Disable unnecessary background applications that might consume system resources while gaming. Use Task Manager (Windows) or Activity Monitor (Mac) to identify and close them.
Game-Specific Optimizations: Many game developers release patches and updates that improve performance. Keeping your games updated ensures you benefit from the latest optimizations. Consider joining online communities dedicated to specific games for additional performance tips and tweaks.
Hardware Monitoring and Upgrades:
Monitoring Temperatures: Use software like HWMonitor or Core Temp to monitor your CPU, GPU, and system temperatures. Ensure they stay within safe operating ranges during gaming sessions. If temperatures reach concerning levels, consider improving airflow within your case or upgrading your cooling solutions.
Overclocking (Optional): For more experienced users, overclocking your CPU or GPU can squeeze out additional performance. This process involves exceeding the stock clock speeds, but be mindful of the risks involved, including potential instability and increased heat generation. Proper cooling is crucial for safe overclocking.
Future-Proofing and Upgradability:
Modular Design: Choose a case and motherboard with ample space for future upgrades. Consider a modular case with removable drive bays for easier access and cable management.
Standardized Components: Opt for components that adhere to current standards like DDR4 RAM and PCIe x16 slots for graphics cards. This ensures compatibility with future upgrades.
Power Supply Wattage: Select a power supply with sufficient wattage to handle your current components and leave some headroom for potential upgrades. Online wattage calculators can help you determine the appropriate wattage for your build.
Advanced Considerations:
Multiple Monitors: Consider adding a secondary monitor for multitasking or an immersive gaming experience with certain titles. Ensure your graphics card has the necessary display outputs.
Solid State Drives (SSDs): While a combination of SSD and HDD is common, upgrading entirely to SSDs offers significantly faster loading times and overall system responsiveness. However, SSDs tend to be more expensive per gigabyte compared to HDDs.
Beyond Performance: Personalization and Aesthetics
Case Lighting: Many cases come with built-in RGB lighting or allow for adding LED strips. Experiment with different lighting effects to personalize the look of your PC.
Custom Cables: Replace standard power supply cables with custom braided cables in colors that complement your build's aesthetics.
Read Also: Cool gadgets for gaming : The Coolest Gadgets for Gamers Who Demand the Best
Aesthetics Mods: Explore options like painting your case, adding custom decals, or replacing components with visually appealing alternatives.
Building and customizing a gaming PC is an ongoing journey. By following these guidelines and delving deeper into specific aspects based on your interests, you can create a powerful, personalized machine that delivers an exceptional gaming experience.


0 Comments